iOS7自定义ViewController动画切换
主要知识点,如图所示:
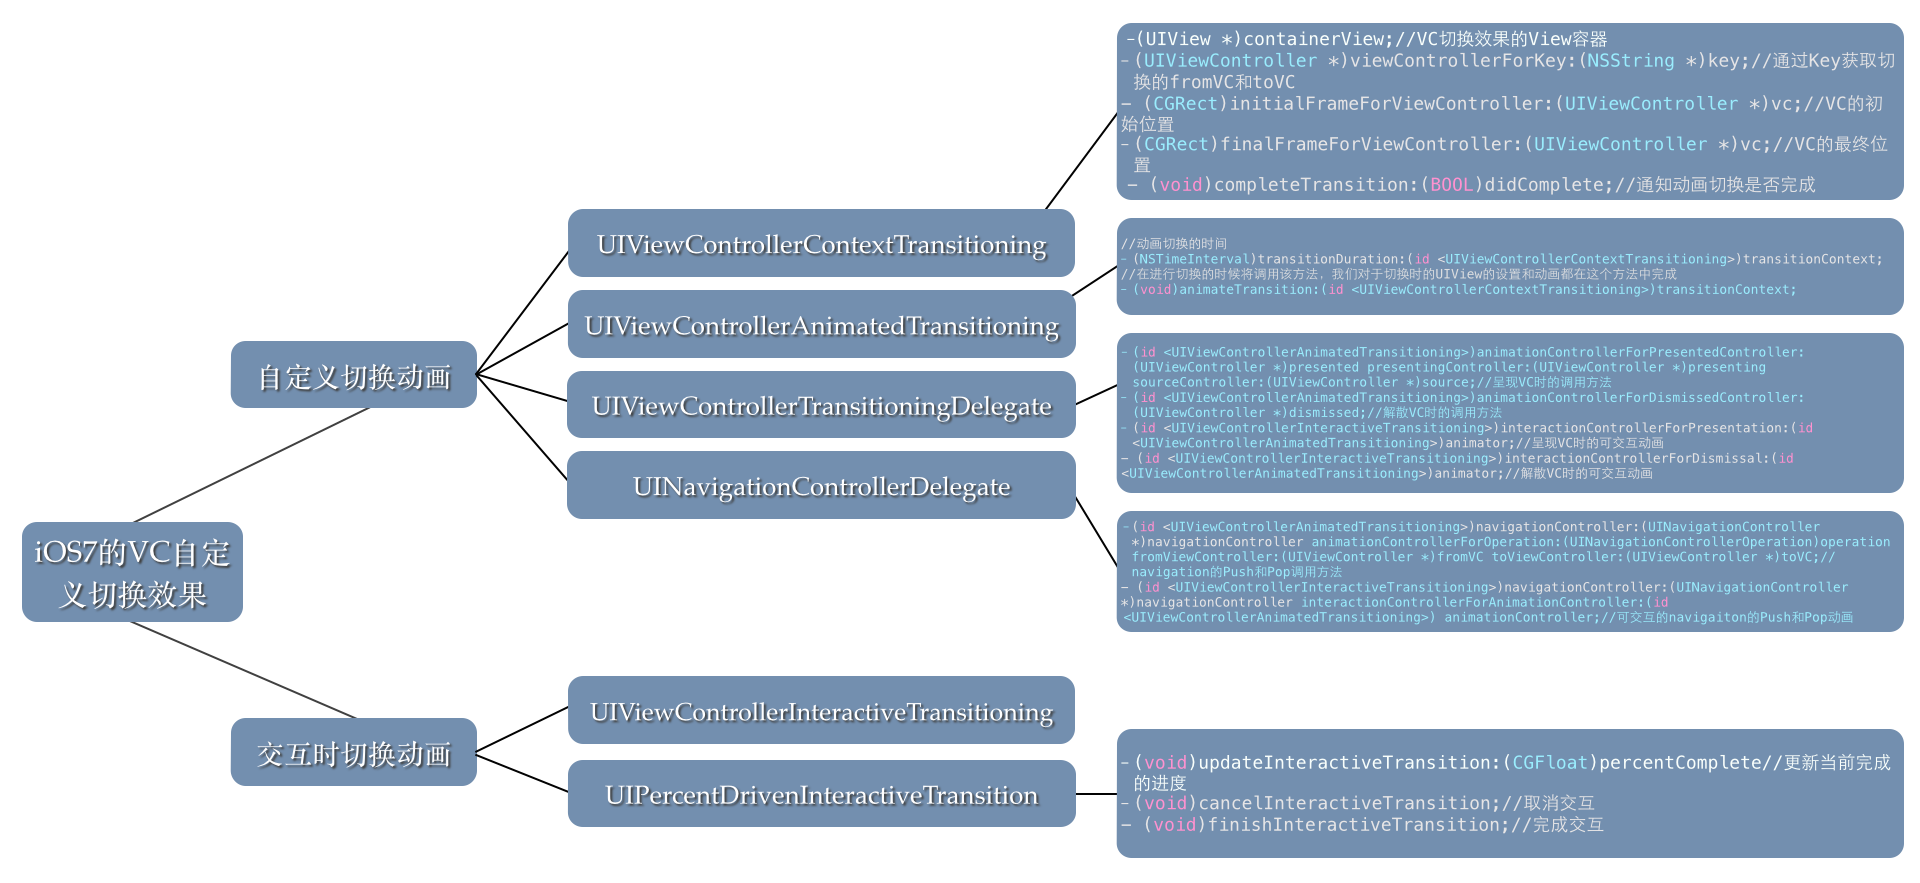
iOS7之后的API添加了很多新功能,其中一个很有趣的功能就是自定义UIViewController的过渡效果。它降低了耦合性,更好的分离功能代码,同时也可以很方便的做出令人眼前一亮的效果。
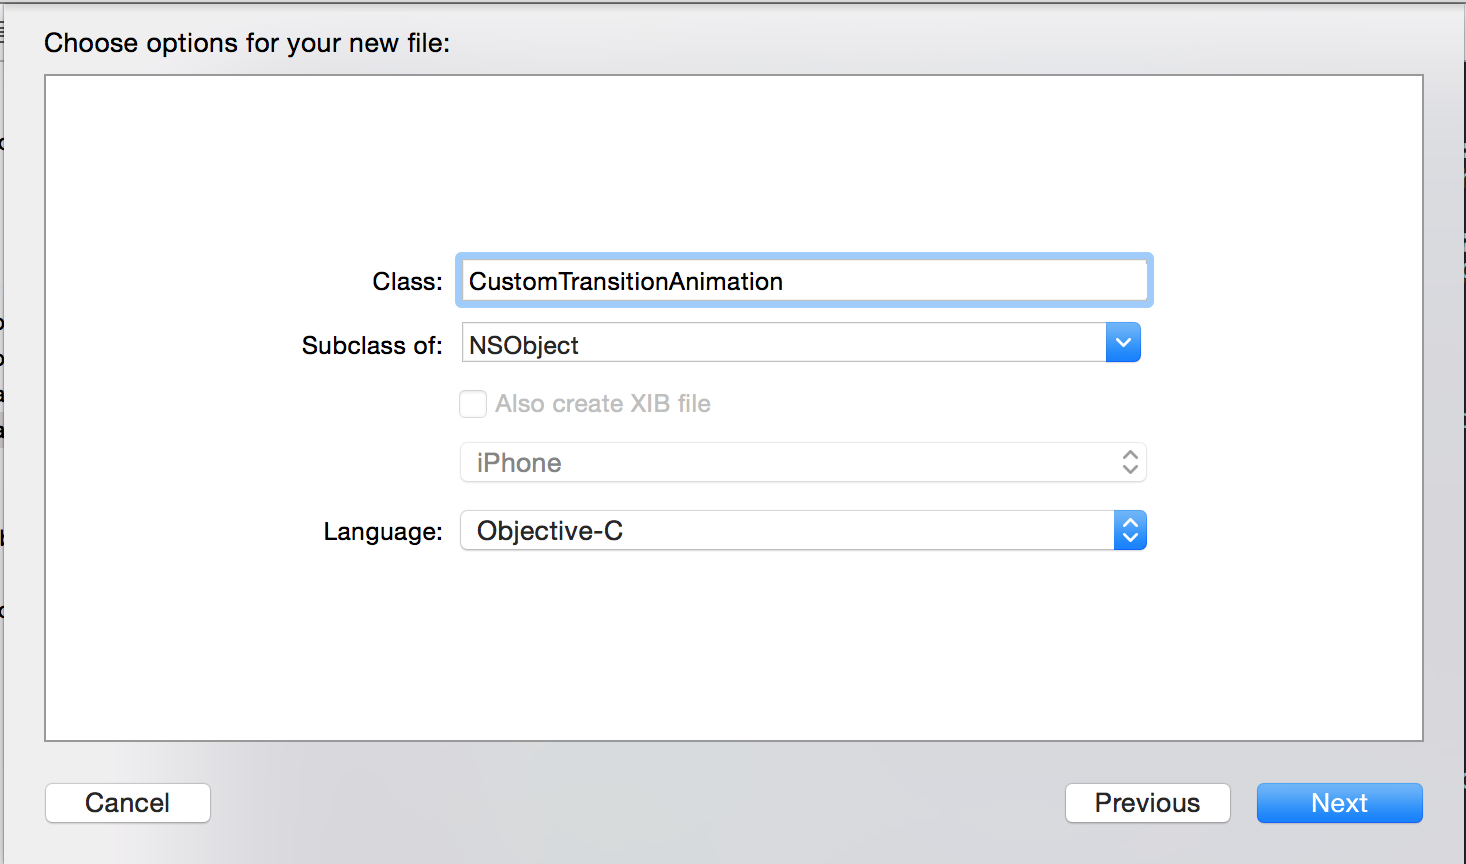
要实现自定义的过渡效果,需要设置UIViewController的transitioningDelegate,它是一个遵守了UIViewControllerTransitioningDelegate协议的对象。首先新建个继承NSObject的对象,命名为CustomTransitionAnimation,如图所示:
修改.h代码如下:
1
2
3
4
5
6
| #import <UIKit/UIKit.h>
@interface CustomTransitionAnimation : NSObject
<UIViewControllerTransitioningDelegate>
@end
|
同时在.m文件中添加UIViewControllerTransitioningDelegate的相关方法,这里主要是两个方法,一个是Present的动画对象,另一个是Dismiss的动画对象。我在对应的方法里添加了一个animationType标识当前的动画类型,方便在后面的逻辑中进行判断。相关方法要求返回一个遵守UIViewControllerAnimatedTransitioning协议的对象,在这里我们设置为当前的对象,并在CustomTransitionAnimation类中添加UIViewControllerAnimatedTransitioning协议的方法。
1
2
3
4
5
6
7
8
9
10
11
12
13
14
| #pragma mark - UIViewControllerTransitioningDelegate
- (id <UIViewControllerAnimatedTransitioning>)animationControllerForPresentedController:(UIViewController *)presented
presentingController:(UIViewController *)presenting
sourceController:(UIViewController *)source
{
self.animationType = CCAnimationTypePresent;
return self;
}
- (id <UIViewControllerAnimatedTransitioning>)animationControllerForDismissedController:(UIViewController *)dismissed
{
self.animationType = CCAnimationTypeDismiss;
return self;
}
|
接着添加UIViewControllerAnimatedTransitioning协议相关的方法,主要是两个,一个是动画的切换时间,另一个是具体的切换代码,包括动画和相关的设置。
1
2
3
4
5
6
7
8
9
10
11
12
13
14
15
16
17
18
19
20
21
22
23
24
25
26
27
28
29
30
31
32
33
34
35
36
37
38
39
40
41
42
43
44
45
46
47
48
49
50
51
52
53
| #pragma mark - UIViewControllerAnimatedTransitioning
- (NSTimeInterval)transitionDuration:(id <UIViewControllerContextTransitioning>)transitionContext
{
//设置Present和Dismiss的动画时间都是0.5秒
return 0.5;
}
- (void)animateTransition:(id <UIViewControllerContextTransitioning>)transitionContext
{
if (self.animationType == CCAnimationTypePresent) {
/*弹出动画*/
//获取containerView视图
UIView *containerView = [transitionContext containerView];
//获取新的Present视图
UIViewController *toVc = [transitionContext viewControllerForKey:UITransitionContextToViewControllerKey];
//对要Present出来的视图设置初始位置
CGRect boundsRect = [[UIScreen mainScreen] bounds];
CGRect finalFrame = [transitionContext finalFrameForViewController:toVc];
toVc.view.frame = CGRectOffset(finalFrame, 0, boundsRect.size.height);
//添加Present视图
[containerView addSubview:toVc.view];
//UIView动画切换,在这里用Spring动画做效果
NSTimeInterval interval = [self transitionDuration:transitionContext];
[UIView animateWithDuration:interval delay:0 usingSpringWithDamping:0.8 initialSpringVelocity:0.5 options:UIViewAnimationOptionCurveLinear animations:^{
toVc.view.frame = finalFrame;
}completion:^(BOOL finished) {
//通知动画已经完成
[transitionContext completeTransition:YES];
}];
}else if (self.animationType == CCAnimationTypeDismiss) {
/*消失动画*/
//获取containerView视图
UIView *containerView = [transitionContext containerView];
//获取已经在最前的Present视图
UIViewController *fromVc = [transitionContext viewControllerForKey:UITransitionContextFromViewControllerKey];
//获取Dismiss完将要显示的VC
UIViewController *toVc = [transitionContext viewControllerForKey:UITransitionContextToViewControllerKey];
//在Present视图下面插入视图
[containerView insertSubview:toVc.view belowSubview:fromVc.view];
//设置最终位置
CGRect boundsRect = [[UIScreen mainScreen] bounds];
CGRect originFrame = [transitionContext initialFrameForViewController:fromVc];
CGRect finalFrame = CGRectOffset(originFrame, 0, boundsRect.size.height);
//UIView动画切换
NSTimeInterval interval = [self transitionDuration:transitionContext];
[UIView animateWithDuration:interval delay:0 options:UIViewAnimationOptionCurveEaseInOut animations:^{
// fromVc.view.alpha = 0.f;
fromVc.view.frame = finalFrame;
}completion:^(BOOL finished) {
//通知动画是否完成
[transitionContext completeTransition:![transitionContext transitionWasCancelled]];
}];
}
}
|
接着在点击按钮时添加present的代码,并设置ViewController的transitionDelegate,如下:
1
2
3
4
5
6
7
8
9
| - (void)onButtonTapped
{
if (!_animator) {
self.animator = [[CustomTransitionAnimation alloc] init];
}
DetailViewController *vc = [[DetailViewController alloc] init];
vc.transitioningDelegate = self.animator;
[self presentViewController:vc animated:YES completion:nil];
}
|
运行并查看效果,将可以看到弹出的视图从底部向上运动,并在到达顶部时以弹簧的效果运动。自定义UIViewController的过渡效果基本内容就是这些,剩下的就是发挥想象,做出惊艳的切换效果吧。
下面接着说一下交互式的切换效果,为过渡添加手势功能。
如同iOS7系统自带的滑动返回一样,接着上面的内容为present视图添加向下滑动返回的效果。查看UIViewControllerTransitioningDelegate协议的内容,发现有两个以interaction开头的方法,这些正是处理交互式切换的方法。它要求返回的是遵守了UIViewControllerInteractiveTransitioning协议的对象。而iOS7中正好提供了一个UIPercentDrivenInteractiveTransition类,它实现了UIViewControllerInteractiveTransitioning的相关接口,为我们提供了一些便利的方法来控制交互式切换。
首先添加手势代码,并利用UIPanGestureRecognizer来做手势的交互
1
2
3
4
5
6
7
| - (void)setPresentingVC:(UIViewController *)presentingVC
{
_presentingVC = presentingVC;
//添加手势
UIPanGestureRecognizer *panGesture = [[UIPanGestureRecognizer alloc] initWithTarget:self action:@selector(handlePan:)];
[_presentingVC.view addGestureRecognizer:panGesture];
}
|
接着在CustomTransitionAnimation添加UIViewControllerTransitioningDelegate的交互方法(这里只处理Dismiss的交互式效果):
1
2
3
4
5
6
7
8
9
| - (id <UIViewControllerInteractiveTransitioning>)interactionControllerForPresentation:(id <UIViewControllerAnimatedTransitioning>)animator
{
return nil;
}
- (id <UIViewControllerInteractiveTransitioning>)interactionControllerForDismissal:(id <UIViewControllerAnimatedTransitioning>)animator
{
return self.interacting ? self.interactiveTransition : nil;
}
|
下面是手势的响应方法,在这里设置交互的进度等功能,如下所示:
1
2
3
4
5
6
7
8
9
10
11
12
13
14
15
16
17
18
19
20
21
22
23
24
25
26
27
28
29
30
31
32
33
34
35
36
37
38
39
40
41
42
43
| #pragma mark - UIPanGestureRecognizer Handler
- (void)handlePan:(UIPanGestureRecognizer *)gesture
{
CGPoint tranlation = [gesture translationInView:_presentingVC.view];
switch (gesture.state) {
case UIGestureRecognizerStateBegan:
{
//设置交互标识为YES
self.interacting = YES;
//生成UIPercentDrivenInteractiveTransition对象
self.interactiveTransition = [[UIPercentDrivenInteractiveTransition alloc] init];
//DismissViewController
[_presentingVC dismissViewControllerAnimated:YES completion:nil];
}
break;
case UIGestureRecognizerStateChanged:
{
//计算当前百分比值
CGFloat percent = tranlation.y / CGRectGetHeight(_presentingVC.view.frame);
percent = MIN(MAX(0.0, percent), 1.0);
//用updateInteractiveTransition通知更新的百分比
[self.interactiveTransition updateInteractiveTransition:percent];
}
break;
case UIGestureRecognizerStateEnded:
case UIGestureRecognizerStateCancelled:
{
//设置交互标识为NO
self.interacting = NO;
//判断是否完成交互
if (tranlation.y > 200) {
[self.interactiveTransition finishInteractiveTransition];
}else{
[self.interactiveTransition cancelInteractiveTransition];
}
//置空UIPercentDrivenInteractiveTransition对象
self.interactiveTransition = nil;
}
break;
default:
break;
}
}
|
最后一步,在点击按钮的时候设置添加手势的ViewController,修改之前的点击代码
1
2
3
4
5
6
7
8
9
10
11
| - (void)onButtonTapped
{
if (!_animator) {
self.animator = [[CustomTransitionAnimation alloc] init];
}
DetailViewController *vc = [[DetailViewController alloc] init];
vc.transitioningDelegate = self.animator;
//设置可交互的ViewController,将为该ViewController添加手势交互
[self.animator setPresentingVC:vc];
[self presentViewController:vc animated:YES completion:nil];
}
|
运行项目并且上下滑动Present视图查看效果,也可以从Github下载本文章的完整Demo。
进阶功能:
1.截图大法:配合- (UIView *)snapshotViewAfterScreenUpdates:(BOOL)afterUpdates方法来实现更炫的过渡效果。
2.mask遮罩:配合view.layer.mask来定制遮罩效果,可参考RN的这篇文章来实现VC间的遮罩过渡。
总结:
目前应用基本都从iOS7开始适配,自定义VC切换将会是UI交互的基本也是很重要的一部分,熟悉并掌握也会更容易做出令人惊艳的交互设计。学习之~